DIY Halter Top Pattern: The Ultimate Guide To Creating Your Own Stylish Tops
Hey there, fashion enthusiasts! Are you ready to dive into the world of DIY halter top pattern creation? Whether you're a beginner or an experienced sewist, this guide has got you covered. Making your own halter top pattern is not only fun but also super rewarding. Imagine walking into a party wearing a top that no one else has – because you made it yourself! So, let's get started and turn your creative vision into reality.
Creating a DIY halter top pattern is like opening a treasure chest of possibilities. You can customize every aspect of your top, from the fabric you choose to the design details that make it uniquely yours. In this guide, we'll walk you through everything you need to know to create your very own halter top pattern, step by step. No more settling for store-bought options that don’t quite fit right – this is your chance to take control of your wardrobe.
Before we dive in, let me just say that sewing your own clothes is one of the most empowering things you can do. Not only does it save money, but it also allows you to express your individuality. Plus, with the rise of sustainable fashion, making your own clothes is a great way to reduce waste and contribute to a greener planet. Now, let's talk about how to create a DIY halter top pattern that fits like a glove and looks absolutely stunning.
- Vegamovie Your Ultimate Destination For Movie Entertainment
- Where To Watch Major Payne For Free The Ultimate Guide
Why DIY Halter Top Pattern is the Next Big Thing
Let’s face it – store-bought clothes can be hit or miss when it comes to fit and style. But with a DIY halter top pattern, you have the power to create something that’s perfectly tailored to your body and your personal taste. The best part? It’s easier than you think. With a little patience and some basic sewing skills, you can whip up a halter top that’s as unique as you are.
Here’s why DIY halter top patterns are becoming so popular:
- Custom Fit: No more dealing with clothes that are too tight in one area and too loose in another. When you make your own pattern, you can adjust it to fit your body perfectly.
- Endless Design Options: Want to add ruffles? Go for it. Love bold colors? Use them. With a DIY halter top pattern, the design possibilities are limitless.
- Sustainable Fashion: By making your own clothes, you’re reducing the demand for fast fashion and helping the environment. It’s a win-win!
- Cost-Effective: Once you’ve created your pattern, you can use it over and over again, saving you money in the long run.
And let’s not forget the sense of accomplishment you’ll feel when you wear a top that you made yourself. It’s like wearing a piece of art – your art.
- Filmy4wap App Your Ultimate Guide To Streaming Movies
- Bollyflix Com Your Ultimate Destination For Bollywood Entertainment
What You Need to Get Started
Before you start creating your DIY halter top pattern, you’ll need a few essential tools and materials. Don’t worry, you probably already have most of them at home. Here’s a quick rundown of what you’ll need:
Tools and Materials
- Measuring tape
- Pencil and eraser
- Fabric marker or chalk
- Ruler or straight edge
- Paper (tracing paper or pattern paper works best)
- Scissors
- Pin
- Fabric of your choice
- Sewing machine or needle and thread
Having the right tools makes the process smoother and more enjoyable. Plus, it helps ensure that your pattern turns out exactly how you envision it. Now that you’ve got everything you need, let’s move on to the next step.
How to Measure Yourself for a Perfect Fit
One of the keys to a successful DIY halter top pattern is taking accurate measurements. This ensures that your top will fit like a dream. Here’s how to measure yourself:
Key Measurements
- Bust: Measure around the fullest part of your bust.
- Waist: Measure around the smallest part of your waist.
- Shoulder Width: Measure from one shoulder edge to the other.
- Back Length: Measure from the base of your neck to where you want the top to end.
Write down these measurements – they’ll be your guide when creating your pattern. Remember, accuracy is key here. If you’re unsure about any measurement, double-check it to avoid any issues later on.
Creating Your DIY Halter Top Pattern
Now that you’ve got your measurements, it’s time to create your pattern. This is where the magic happens. Follow these steps to bring your vision to life:
Step 1: Sketch Your Design
Start by sketching out your halter top design on paper. Think about the neckline, straps, and back style. Do you want a crisscross back or a simple tie? This is your chance to get creative!
Step 2: Draft the Pattern
Using your measurements, draft your pattern onto the paper. Start with the front piece, then move on to the back. Don’t forget to add seam allowances! A general rule of thumb is to add about 1/2 inch around the edges.
Step 3: Cut Out the Pattern
Once you’re happy with your design, carefully cut out the pattern pieces. Double-check that everything lines up correctly before moving on to the next step.
Creating your pattern might seem intimidating at first, but trust me, it’s easier than it looks. Just take it one step at a time, and you’ll be amazed at what you can accomplish.
Choosing the Right Fabric
When it comes to DIY halter top patterns, choosing the right fabric is crucial. The fabric you select will affect the drape, fit, and overall look of your top. Here are some popular options:
Fabric Options
- Knit Fabrics: Great for stretchy, comfortable tops. Think cotton jersey or rayon spandex.
- Woven Fabrics: Perfect for structured halter tops. Try lightweight cotton or silk blends.
- Lace or Mesh: For a more delicate, feminine look. Pair with a lining for added coverage.
Consider the occasion and the season when choosing your fabric. A lightweight, breathable fabric is ideal for summer, while a heavier fabric might be better for cooler weather.
Top Tips for Sewing Your Halter Top
Now that you’ve got your pattern and fabric, it’s time to sew your halter top. Here are a few tips to help you along the way:
Tips for Success
- Test Your Pattern: Before cutting into your main fabric, make a muslin version to test the fit.
- Use the Right Needle: Match your needle type to your fabric. For example, use a ballpoint needle for knit fabrics.
- Take Your Time: Rushing can lead to mistakes. Sew slowly and carefully for the best results.
Remember, practice makes perfect. If something doesn’t turn out quite right the first time, don’t get discouraged. Every project is a learning experience, and you’ll only get better with time.
Common Mistakes to Avoid
Even the most experienced sewists make mistakes from time to time. Here are a few common pitfalls to watch out for when creating your DIY halter top pattern:
Mistakes to Watch Out For
- Skipping the Muslin Test: Always test your pattern before cutting into your main fabric.
- Ignoring Seam Allowances: Forgetting to add seam allowances can result in a top that doesn’t fit properly.
- Using the Wrong Fabric: Make sure the fabric you choose is suitable for the design you have in mind.
By avoiding these common mistakes, you’ll increase your chances of creating a halter top that fits perfectly and looks fantastic.
Styling Your DIY Halter Top
Once you’ve sewn your halter top, it’s time to style it to perfection. Here are a few ideas to get you started:
Styling Ideas
- High-Waisted Jeans: Pair your halter top with high-waisted jeans for a classic, effortless look.
- Flowy Skirts: For a more feminine vibe, team your top with a flowy maxi skirt.
- Leather Shorts: Want to make a bold statement? Try pairing your halter top with leather shorts for a chic, edgy look.
The key to styling your DIY halter top is to have fun with it. Experiment with different outfits until you find the perfect combination that reflects your personal style.
Conclusion: Take Your Fashion Game to the Next Level
Creating a DIY halter top pattern is an exciting journey that allows you to express your creativity and personal style. With the right tools, measurements, and techniques, you can make a top that fits perfectly and looks amazing. Remember, practice makes perfect, so don’t be afraid to experiment and try new things.
I encourage you to share your creations with the world. Post pictures of your DIY halter tops on social media and inspire others to join in on the fun. And don’t forget to check out our other articles for more sewing tips and tricks. Happy sewing, and let’s make fashion personal again!
Table of Contents
- Why DIY Halter Top Pattern is the Next Big Thing
- What You Need to Get Started
- How to Measure Yourself for a Perfect Fit
- Creating Your DIY Halter Top Pattern
- Choosing the Right Fabric
- Top Tips for Sewing Your Halter Top
- Common Mistakes to Avoid
- Styling Your DIY Halter Top
- Back To The Future 4k The Ultimate Experience For Scifi Fans
- Unleashing The Power Of Ibomma Movies Your Ultimate Guide To Streaming Bliss
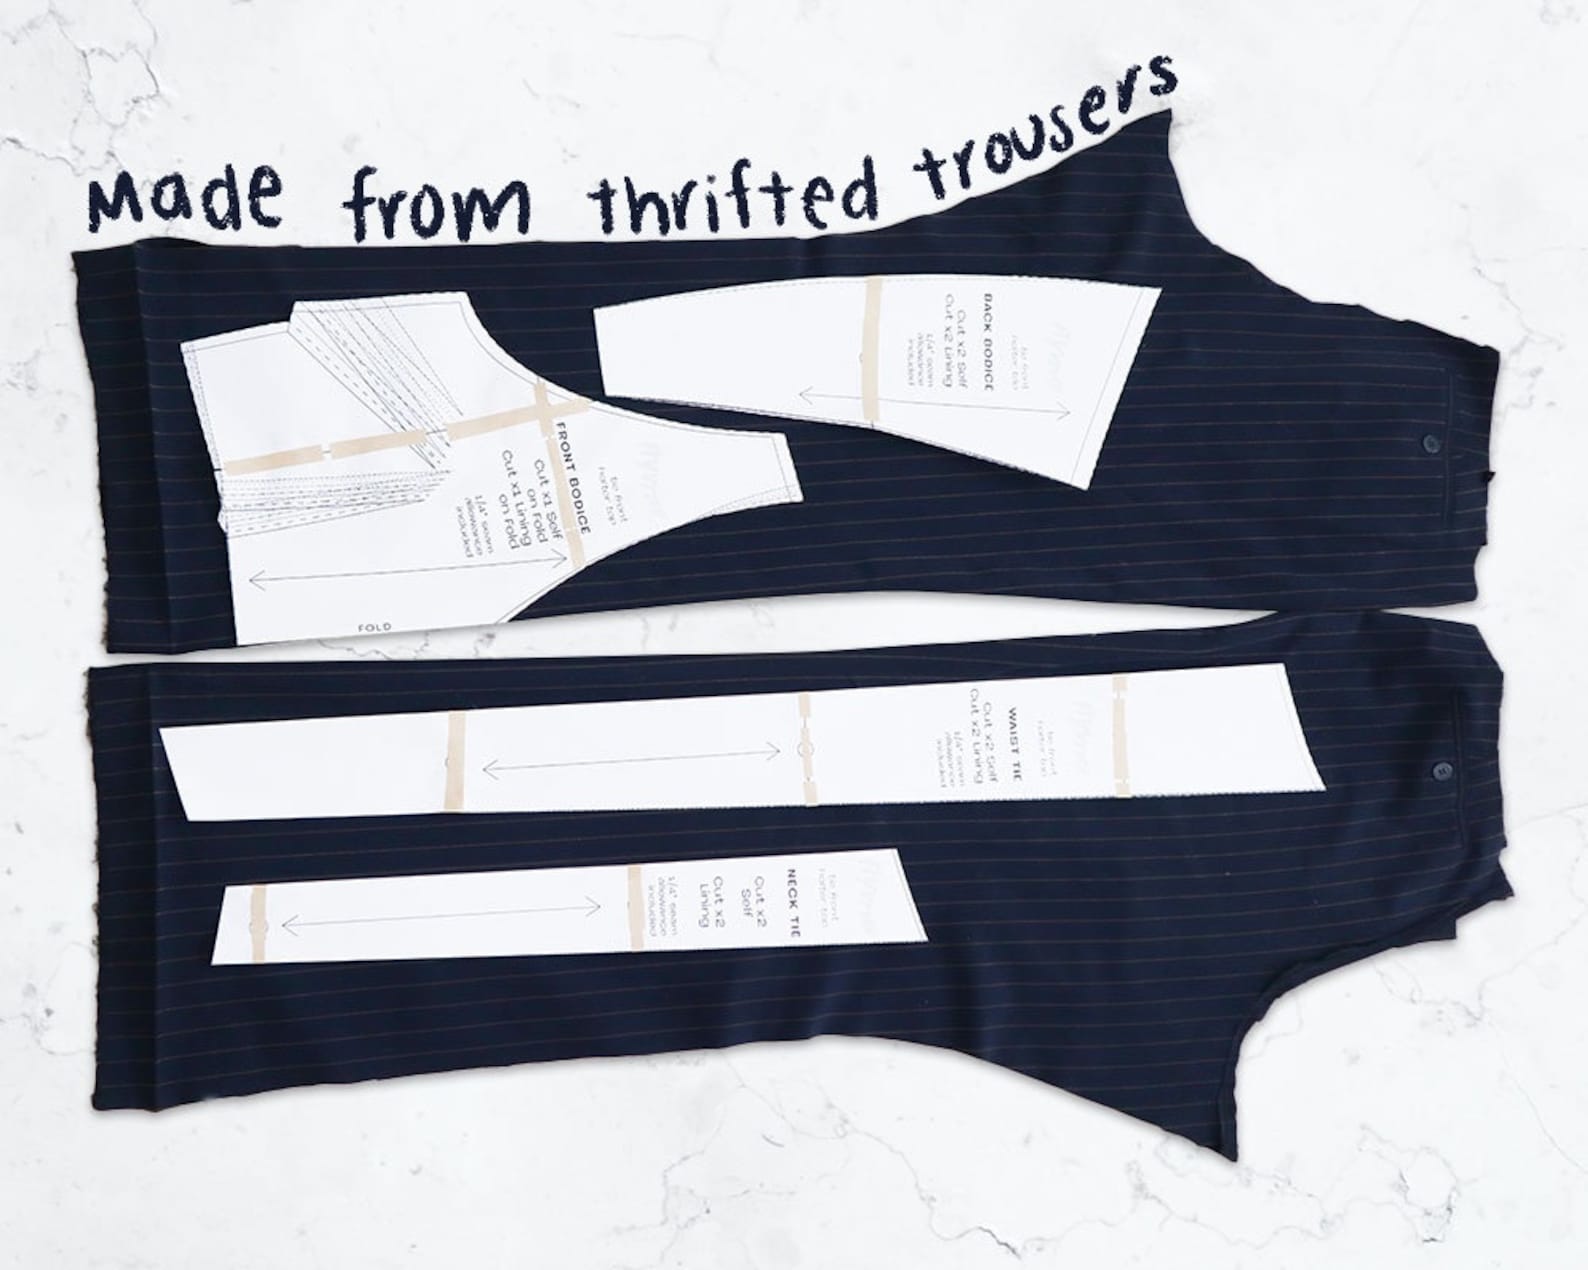
Reversible Halter Top Pattern PDF, DIY Halter Top, PDF Sewing Pattern

Stylish DIY Halter Tops
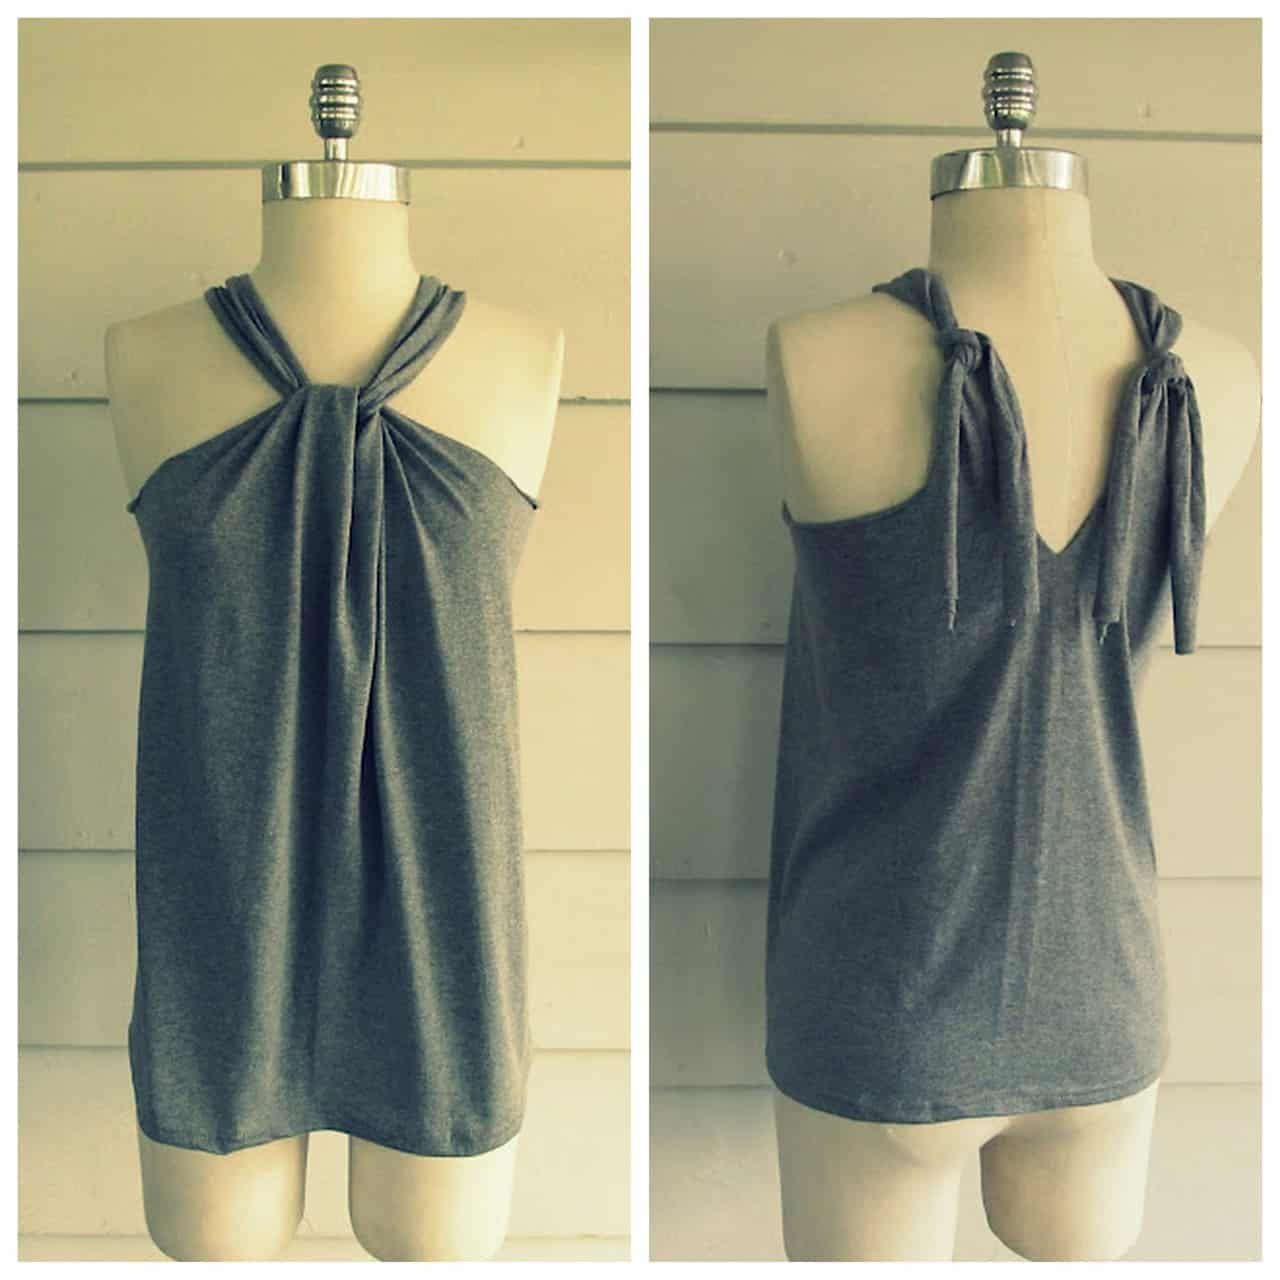
Stylish DIY Halter Tops
